Creating Safety Valves
Help your woodworkers get out frustration!
 Woodworking can be tough and tools can be tempting. In this video, learn how a hammering log can provide an outlet for frustratated or distracted woodworkers as well as provide an activity in between classes.
Eye Ear and Dust Protection
Keep your woodworkers eyes, ears, and lungs safe!
 While hand tool woodworking is safer than using power tools, you do need to consider when to use eye and ear protection. In this video, learn how to prevent eye, hearing, and breathing injuries.
Leading Safe Programs
Learn to lead safe woodworking programs!
 Safety is up to you, the instructor. In this video you will learn the five rules of Maplewoodshop and how to maintain a safe environment in your class.
Maplewoodshop Safety Demo
Learn to lead safe woodworking programs!
 Safety is up to you, the instructor. In this video you will learn the 10 rules of Maplewoodshop and how to maintain a safe environment in your class.
Room Setup and Safety
Learn how to set up and manage your portable woodshop!
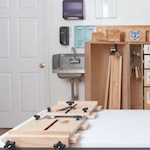 A safe room enables safe woodworking. In this video learn how to set up your tables, walk with tools, label projects and manage dozens of woodworkers per day.
The Toolbox
Learn the features of the Maplewoodshop toolbox!
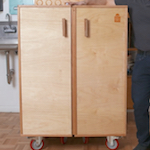 The Maplewoodshop toolbox has everything you need to offer hand tool woodworking. In this video, get to know the features of the toolbox and even how to transport it if you have mulitple locations.
Welcome to Maplewoodshop!
Start here. We are glad you are here!
 Welcome! We are so happy you are here and look forward to sharing information on safety, tools, and projects you can offer your budding woodworkers!
Why we use Pull Saws
Learn why we use these Japanese saws!
 Some people ask why we use pull saws. In this video learn why and also how it relates to photosynthesis! An interesting connection to be sure.
Work with your Core
Learn how to make woodworking easier!
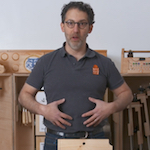 Woodworking, like a sport, is most fun when done right. In this video, you will learn the body mechanics of using hand tools to help your woodworkers get the most from their experiences.
How to use a Bit Brace Drill
Learn to use a large drill!
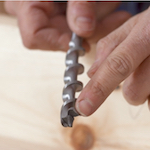 The bit brace drill is a powerful and effective tool for making medium and large holes. It is an elegant example of how a lever and a screw (simple machines) can be combined to make a powerful tool. In this video learn how to set up your drilling station, how to drill, how to remove chips that may jam your drill, and how to change bits.
How to use a Block Plane
Learn to use a small but powerful tool!
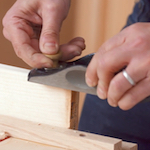 The block plane is very effective at smoothing and shaping wood. You can use it to square up boards, flatten edges, and create lovely profiles. In this video learn how to do each of these operations as well as how to maintain this tool.
How to use a Combination Square
Learn to make square cuts and more!
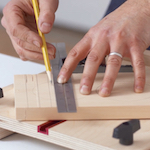 The combination square is useful for making perpindicular and diagonal lines. It has a level and a scratch awl as well. In this video learn how to use each feature and how to 'repair' when the ruler comes out of the body.
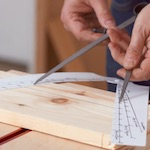
How to use a Compass
Learn to use this ancient tool!
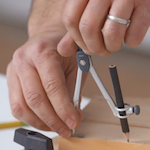 The compass helps you draw circles and even find midpoints of lines! In this video we will explore this ancient and powerful tool.
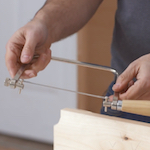
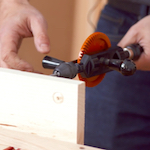
How to use a Coping Saw
Learn to make curves in your projects!
 The coping saw allows you to cut curves and add creativity to your projects. It takes a while to learn but is worth the effort. In this video you will learn how to use and maintain the coping saw.
How to use a Coping Saw - Advanced Features
Learn advanced techniques using a coping saw!
 The coping saw can do more than curves. You can create blind curves and rotate the handle to get more access when needed. Watch this video to unlock advanced techniques.
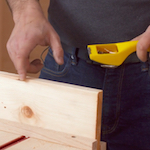
How to use a Hammer
Learn to hammer without hitting your thumb!
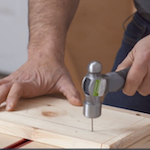 Tap, tap, bang goes our saying to avoid hitting your thumb. In this video, learn how to effectively use a hammer.
How to use a Pull Saw
Learn to saw with one hand or two!
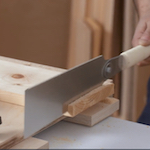 The pull saw is easy to learn and can make fast work of sawing wood. In this video, you will learn proper stance for both one handed and two handed sawing. Remember, pull, reset and repeat!
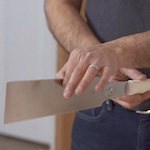
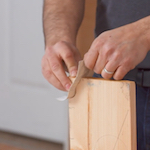
How to use a Rasp
Learn to shape wood with this handy tool!
 The rasp is effective at removing material to shape wood. In this video you will learn how to pull the rasp to success working with the grain of your project.
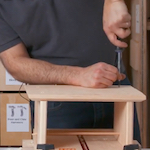
How to use a Screwdriver
Learn to connect wood with screws!
 The screwdriver is a hard tool to learn for young woodworkers. In this video, you will learn how to use one hand to drive and one hand to steer the screwdriver and make it easy to learn.
How to use a Tape Measure
Learn to measure accurately!
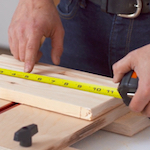 The tape measure can teach us a lot about fractions, find distances, and even find the midpoint of a board. In this video, learn techniques to make the most of this tool.
How to use an Eggbeater Drill
Learn to make small holes effeciently!
 The eggbeater drill works well when you spin it fast. In this video, learn how to drill without jamming and what do to when you do jam.
How to use F Clamps
Learn to secure your wood!
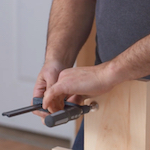 There is a saying that you can never have too many clamps. In this video you will learn how to use these effective clamps to prevent blow out when drilling and how to use them for a variety of tasks.
How to use Sandpaper
Learn to smooth your projects!
 Sandpaper can make a project feel truly finished. In this video you will learn the difference between grits and how to use sandpaper effectively.
How to use Sector and Divider
Learn these ancient and very effective tools!
 The sector and divider have been around for thousands of years. In this video you will learn how to scale projects up and down using simple, whole number fractions.
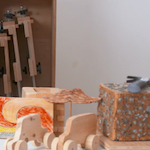
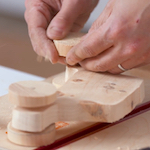
Intermediate - Make Scrapatecture
Learn to make projects from the scrap bin!
 For intermediate woodworkers. Once woodworkers have learned tools via other projects, they also have created a decent cache of scrap wood. In this project, encourage free form creativity while they make what they want from your scrap bin.
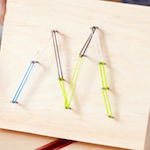
Intermediate - Variations on String Art
Learn to make sophisticated projects using hammers, nails and string!
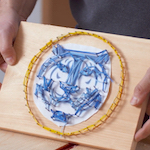 For intermediate woodworkers. Once woodworkers have learned how to hammer, you can introduce a wide range of much more complex string art. You can even make very large scale mosaics as legacy projects.
Advanced - Dog Lamp
Imagine creating a working lamp the looks like your favorite pet. In this project you can!
 For advanced woodworkers. This Dog Lamp along with accompanying shade will light up your life. Pull saw cutting, coping saw cutting (as desired), drilling and the builders first taste of hardware will come into play. Four legs, a body, and two neck pieces are cut out to the designed shapes, drilled and joined together using hex bolts, lock washers, and wing nuts. The builders will use compasses on thick paper stock two lay out and cut out the shape. A lamp kit will be inserted into the neck along with the shade and viola - a working lamp!
Advanced - Make a design Challenge
Challenge your advanced woodworkers to make their own creations!
 For advanced woodworkers. Once you have worked through each of the projects, your woodworkers are ready to try their own ideas. In this video, learn how to develop a design challenge for your advanced woodworkers.
Advanced - Make a Footstool
Make a sturdy and elegant footstool!
 For advanced woodworkers. In this project, your woodworkers will make a real piece of furniture. The footstool project teaches how screws and a dowel can make a strong leg assembly. This project lends itself very well to decorative edges using the block plane. Woodworkers should do the Jenga Blocks and Keepsake box or Tooltote before doing this project.
Advanced - Make a Tooltote
Make a custom and functional tool tote!
 For advanced woodworkers - Make a custom tooltote! This variation of the tooltote project uses three equal length pieces of wood which means that your woodworkers get to rip one piece along its length and then plane it to size. Very engaging project and should be done after Jenga Blocks.
Advanced - Three-String Guitar
Learn to create a tunable, working three-string guitar!
 For advanced woodworkers. This is the project to challenge your tool skills as well as your musical ones! Using two boards of wood and the pull saw builders will be able to rip and crosscut all the needed wood pieces. The large board is drawn out with stacked pieces, so precise cuts will be required. The same is true of the straightness needed when drill three holes. Buddies will be a great help in various elements of this project. For the sound hole, the video will show an easy ans a challenging method of cutting. There will be guitar strings, dowels, eye screws, lock nuts, and washers put the use along with 3D nails, so the woodworker will have much order of operations to keep in mind for the great project!
Advanced - Trophy Rack
Learn to build a beautiful rack to show off your trophies and ribbons!
 For advanced users. Make a super trophy rack. This project allows woodworkers to use the pull saw, brace drill, dividers, and egg beater drill for shelf strength and dowel positioning. Top edges can even be customized to the individual's choice using a coping saw.
Advanced - Wren Birdhouse
Make a beautiful birdhouse for the indigenous Wrens!
 For advanced woodworkers. This isn't your typical birdhouse. Using the pull saw and the brace drill along with the block plane and one very important screw, builders will create a birdhouse with a pivoting side for cleaning out the inside for the birds comfort.
Basic - Make a Keepsake Box
Make a simple box from a single plank of wood!
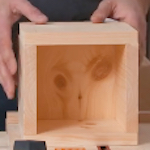 For basic woodworkers. Make your own keepsake box from a single plank of wood! This project can be combined with a short Jenga blocks project so that woodworkers learn how to use the saw.
Basic - Make Jenga Blocks
Learn to saw while making toys!
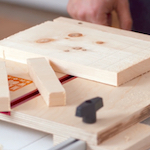 This starter project allows woodworkers to learn how to use the pull saw. They end up with a series of one inch wide blocks that can be made into other sculptures or used in future projects.
Basic - Make Jigsaw Puzzles
Learn the coping saw while making toys!
 This starter project allows woodworkers to learn how to use the coping saw. They can design puzzles on two sides of a board then cut a random or patterned shape.
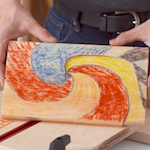
Basic - Make String Art
Learn the hammer while making keepsakes!
 This starter project allows woodworkers to learn how to use a hammer. They can use templates or design thier own creations.
Basic - Simple Cell Phone Stand
Learn to create a simple cell phone stand that can be used anywhere!
 For basic woodworkers. Using a 9" board, woodworkers will learn about properly positioning wood in the vise for best practices. Learn to use the 90°portion of the combination square as well as use both blades of the pull saw to cut triangles vertically. Also, woodworkers will get used to using sight and feel for placement of project pieces for marking and nailing.
Intermediate - Cell & Tablet Holder
Learn how to create a Cell & Tablet Holder for your comfort and convenience!
 For intermediate woodworkers. Make this multi-functional electronics holder with four simple pieces. Use the pull saw to rip and crosscut pieces that have been drawn out in a stacked method. After assembling all the pieces with 3D finishing nails, use the block plane to smooth edges for a finished look.
Intermediate - Make a Cut-Out Car
Learn to make a toy from scratch!
 For intermediate woodworkers. Make your own toy! This project allows woodworkers to design and cut out their own car. Wheels are cut from a 2" dowel and joined with a wood dowel for an axle.
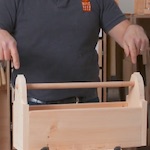
Intermediate - Make a Tooltote
Learn to make your own roomy tool tote!
 For intermediate woodworkers. Make your large tool tote. This project is conceptually similar to the keepsake box but adds a handle and the opportunity to create your own profile on the ends. Very good for teaching order of operations and one of most popular projects.
Intermediate - Napkin Holder
A good way to turn scrap wood into a great napkin holder!
 For intermediate woodworkers. Make a napkin holder using four simple pieces. Use the pull saw to rip and crosscut materials. Here drilling kicks up to a higher level.Using a sacrificial board, pieces are lined up and holes are created with a narrow bit. Each of the two boards are then drilled with different sized holes allowing the base to keep dowels stationery and the slide with slightly bigger holes so the piece may freely ride up and down the dowels to hold the napkins securely! Using the pencil sharpener on the dowels before assembling adds a professional look!